As we move through the alphabet we are taking a break at the letter D this week. Some words that start with D are: Daughter, Dinner, Dessert, Dirt, Dribble, Dragon, Dinosaur, Duck, Doorknob, Doll, Dog and Disc.
To print the letter D, just click on print and follow the directions. D
For our craft project we decided to start with Dinosaur. We printed the letter D and painted it green. Once it was dry we turned it on its side and put spikes made of sticky backed craft foam along the back and drew on a face.
Our next project was a Duck. We painted the letter D with green, brown, yellow and orange. Once the paint dried we then glued on some wings. These were the feathers we had but any type of feathers would work.
Another craft that we were going to try out was Dirt. We were going to cover the letter D with glue and then sprinkle on some dirt and let it dry. We ended up having a busier weekend then I planned so we were unable to get to that.
You can print out the letter D and put it in a clear sheet protector/report cover or laminate it and give the child a dry erase marker to practice writing the letter D.
You can write the letter D on a chalkboard and give the kid a small amount of water with a paint brush. They can dip the brush in the water and use it to erase/trace your letter.
Find the letter D. Give a child a marker and an old magazine or newspaper. Ask them to go through a few pages and circle the letter D.
Lacing Cards - Print out the letter D and laminate it. Punch a hole every inch or so and let the child lace yarn or a shoestring.
Paint Bag - Squirt some tempura paint of shaving cream in a zipper style bag. Seal the bag, squeezing out as much air as possible. For safety and cleanliness sake, tape the bag closed also. Now put the bag on the desk and allow the child to trace the D.
All crafts that are easy to save, please hold onto those and put them all in a Alphabet Binder for the child. To make the binders I will put the pictures in sheet protectors and then put them in a 3 ring binder.
Some foods that start with the letter D are: Doughnuts, Dijon Mustard, Devil's Food Cake, Deviled Eggs, Dumplings, Dill Pickles and Dressing.
For our food activity we decided to make Dirt Cups and they were delicious!
We used little clear cups and layered in chocolate pudding covered with crushed chocolate sandwich cookies. We then put Gummy Worms or Sour Worms on top of the "Dirt".
Take some time and practice the alphabet with your kids.
The 4th of July will soon be upon us and this is a great time to celebrate with family. You can have a cook out, a pool party or go see a parade. Here are some ideas I found online to have some fun.
All Star Activities has some great ideas for lots of holiday fun but on the 4th of July they run the gamut of easy punch recipes and the more detailed watermelon that you see above.
Family Fun magazine always has some great ideas and the 4th of July is no different. They have great crafts and games to play.
Celebrations.com has some great recipes for your 4th of July party. These great recipes even include 5 different S'mores recipes.
I hope you take some time this 4th of July to enjoy good times with good friends and family. Be careful and keep a close on any kids when the fireworks are being used. Happy 4th of July!!
We have all seen the pre-packaged memory games in the retailers. They are fun but you can make one for next to nothing that is focused on your child's interests.
We have a huge beach/fish theme in our house so we made one with that theme.
I was in Goodwill, which is a great place to find supplies for crafts and activities for next to nothing. While cruising the aisles, I saw a HUGE bag of shells for $1.00. There were near 200 shells in this bag. I went ahead and purchased it having no idea what I would use them for. After a couple of weeks of staring at them and picking them up after my son played with them I decided to make them into a memory game. I dug through our sticker stash and found some beach themed stickers. I needed two of each stickers so I just dug around until I found matching ones. I did not have enough beach themed stickers to make a whole game so I did use some other animal stickers but my son does not seem to mind. Most of these stickers came from Target's dollar spot or from Michael's dollar area.
I found shells that were close in size and then I cleaned and dried them well. Once they were dry, I just stuck the stickers inside them. You can not have stickers that are too big so keep that in mind when looking for stickers.
When it is time to play, just lay the shells in a grid, sticker side down and then you follow the original memory game rules. When we first started, I set the matching ones side by side to let him learn the concept.
As for storage of my homemade games and manipulatives, I use empty food containers. The memory game is stored in an empty oatmeal container. I used card stock to cover the old label and secured it with double stick tape to the outside of the container. I then made a label for the container.
Well, now that summer has officially arrived it is time to start thinking about everyone's favorite summertime activity, the pool!
Let's talk about pool safety. As you get ready to go swimming, please remember to watch the kids closely as each year nearly 300 children under the age of 5 drown in residential and commercial pools and nearly 300,000 children go to the emergency room for submersion incidents in pools. Few people realize the hidden dangers from drain or suction entrapment. Drains with broken, missing, or faulty covers can entrap hair, the body, limbs, jewelry and clothing, or cause disembowelment/evisceration. Always remember that a pool drain can be strong enough to trap an adult underwater, so never take your eyes off of kids in a pool. You should always have at least one "pool watcher" when kids are in the pool. If the child is under the age of five, the American Academy of Pediatrics endorses "touch supervision" which means that an adult is always within an arms reach of a child in the pool. Never leave pool toys in the pool when you are not in the pool. This just needlessly tempts children to "reach in" and get their toys, which could result in them falling in the pool.
Everyone in the pool area should know how to swim and there should always be some people that know basic pool safety, like CPR. If you have a residential pool, please remember that it is your responsibility to ensure a safe experience for any persons in or around your pool. The basic safety precautions for a pool owner are installing fences and other barriers, using pool alarms and covers and being sure that all drains are in proper working condition. It is recommended that a pool have at least a four foot barrier, such as a fence with a self closing and self latching gate.
We tell you these things not to frighten but to inform. There is no need to stay away from this popular past time, as long as you are informed and prepared. If you are not current with your CPR certification, you can contact the local Red Cross for classes. If you are in the Lexington, KY area you can also contact the Child Care Council of Kentucky at 859-254-9176 or check our website for a listing of upcoming CPR and First Aid classes.
Get out and have some fun this summer but be sure you protect your kids!
This week are moving on to the letter C. I thought of lots of cute things that start with a letter C: cats, collage, continents, cleaning etc., but these are the things we Crafted (another C).
You can print out the letter C by going to to the shared file page.
Our first craft was for Cars. We rolled the wheels of some of our little cars in some watered down tempura paints and then we rolled them across the letter C page. My son had a lot of fun with this and I actually had to supply him with several pages of paper to "drive" on as he thought that was one of the coolest things he had ever done. I will give you a tip about this though, the cars that have "tread" on the wheels make the best and most realistic tire marks but they also soak up the most paint and take the longest to dry out.
Out next craft was Caterpillars. We pulled out the stamp pad with multiple colors to it and stamped his finger on the C page. Once that ink had tried, which did not take long, I went back and drew in the details. I always love the finger/hand/foot print crafts we do as they seem so personal.
The next C word we discussed was Circles. We used our Do A Dot Art Markers for the circles on our page but you could just as easily make smaller circles by using a pencil eraser or any other round items you find around the house.
You can print out the letter C and put it in a clear sheet protector/report cover or laminate it and give the child a dry erase marker to practice writing the letter C.
You can write the letter C on a chalkboard and give the kid a small amount of water with a paint brush. They can dip the brush in the water and use it to erase/trace your letter.
Find the letter C. Give a child a marker and an old magazine or newspaper. Ask them to go through a few pages and circle the letter C.
Lacing Cards - Print out the letter C and laminate it. Punch a hole every inch or so and let the child lace yarn or a shoestring.
Paint Bag - Squirt some tempura paint of shaving cream in a zipper style bag. Seal the bag, squeezing out as much air as possible. For safety and cleanliness sake, tape the bag closed also. Now put the bag on the desk and allow the child to trace the C.
All crafts that are easy to save, please hold onto those and put them all in a Alphabet Binder for the child. To make the binders I will put the pictures in sheet protectors and then put them in a 3 ring binder.
Food Suggestions for the letter C:
Corn, Cookies, Crabs, Chicken, Candy, Cheese, Cream Cheese, Cottage Cheese. Cauliflower, Cupcakes, Carrots and Chow Mein Noodles
For our letter C food, we decided to make Cookies. Now just like many of you, I am a working mom which means there is not always a lot of "extra" time in my days. As a result you will notice that these cookies have a distinct square shape to them, that is because they are break and bake cookies. There is never any shame in taking a little help to get your to do list completed.
As you look around the Internet, Fairy Gardens are still very big. Before I had my son, I worked part time at a local garden center so I could get a discount on my home landscaping and she made some beautiful Fairy Gardens. It is just enchanting to see these little gardens with everything done in a miniature form. They usually contain small plants and dollhouse sized furniture which is easy to come by.
I am going to include pictures of some of the beautiful Fairy Gardens I have come across but please only use these as starting points, this is a time to let the kid's creativity come alive. If your child is not really interested in fairies, you could always make it a Dragon Garden, Prehistoric Dinosaur Land or even a Commando Jungle with little army men.
Do you believe in fairies? has some great information on things needed to attract fairies to the garden. As we all know, fairies are particular about their environment.
Mystic Mountain Arts has some beautiful examples of fairy gardens. There are plenty of pictures and they range in size from planters to gardens.
Sugar Creek Gardens even shows that it is a good idea to decorate for the holidays for your fairies if you want to keep them around all the time.
Now that I have give you some visuals to look at I want to give you some ideas for supplies. When I worked at the garden center, we found supplies everywhere. The craft store is a good spot to find tiny terracotta pots, the stained glass shop is a great place to find scraps of glass that are suitable for ponds, creeks, etc. The fairy houses can be made of small sticks from your backyard stacked up log cabin style or you can cover a small milk carton with the sticks. If you have a large tree that you are planting the garden by, you can attach a dollhouse door to the tree to serve as your fairy door. Trust me, the fairies will use their magic to open the doors.
I hope you will take the time to bring a little magic and outdoor time into your life by planting a fairy garden.
On the calendar that we provided for June (see the heading of June on the sidebar to the right) we said to declare this Family Science Night and to find some experiments to do at home with your kids. As a starting point, I thought I would list a few resources for you.
First and foremost I have to mention Steve Spangler Science, they have some great experiments listed on their website and they are all listed out by type of experiment. For example; Density, Chemistry, Food Science, etc. I enjoy this page but sometimes they try to push their products too much. Many people will have the items they need right in their own home.
Next up is Bizarre Stuff. I know the name may be intimidating but there are some good experiments on there so please check it out.
The next one I have for you is Daphne the Science Guinea Pig. This is a great place to ask questions. You just type in your questions and Daphne will send you the answers. It is fun for kids since they get answers and they get to look at a cute guinea pig.
The next idea is a little crazy but if you want to go the route of the "Mad Scientist" you could serve it up for dinner. My child is only three so it is not something I am ready to do just yet but the food is "Spaghetti Dogs". The premise is you cut the hot dogs into pieces about 3" long and then you stick raw spaghetti through the cut sides. You will use about 3 pieces of spaghetti per one piece of spaghetti. Once that is complete you will put them into a pot of boiling water. When the pasta is cooked you can remove them and serve up some "Home made Octopus" to the kids. I did not personally prepare this so I do not have a picture, but you can search for Spaghetti Dogs and find several images.
This Sunday, June 20th will be Father's Day. I wanted to write a post to discuss the past of Father's Day and how it came to be. I did some research and was saddened by many of the things that I discovered.
Mother's Day was first recognized in 1909 but Father's Day was not nationally recognized until 1966. I find it disheartening that it took 57 years between the holidays being recognized. There were numerous attempts prior to 1966 to recognize Father's Day but it was often met with satire and jokes. People felt it was not "important" and it was just another way to add unimportant dates to the calendar. The campaign to recognize Father's Day was spearheaded by Sonora Smart Dodd of Spokane Washington. Her father was a single father after her mother died giving birth to her sixth child.
Ms. Dodd campaigned for years and approached ministers, the YMCA and YWCA to help her cause. Finally in 1966, President Lyndon Johnson issued the first presidential proclamation to honor fathers. Six years later, in 1972 President Richard Nixon signed it into law to declare the third Sunday of June as Father's Day.
I am thankful for all of Ms. Dodd's tireless efforts to recognize fathers. There are many great Dads in the world and they are worthy of celebration. The third Sunday of June is Father's Day but we should be taking time throughout our year to show our fathers exactly how much we appreciate them.
I hope you will all take some time this weekend to spend with your fathers.
Moving onto the next letter now. For the letter B there are a variety of foods and crafts that you can do.
For our B template, you can click on the print button and follow the directions. B
Our first activity will be Butterflies. I put together a page of butterfly clip art that you can print out. I was going to cut out the butterflies and have my son glue them onto the letter B but I found some cute butterfly spangles in our craft supplies so we used those instead.
If you use the clip art you do not have to cut out the antennas for the butterflies because you can just draw them on easily once the child glues them on.
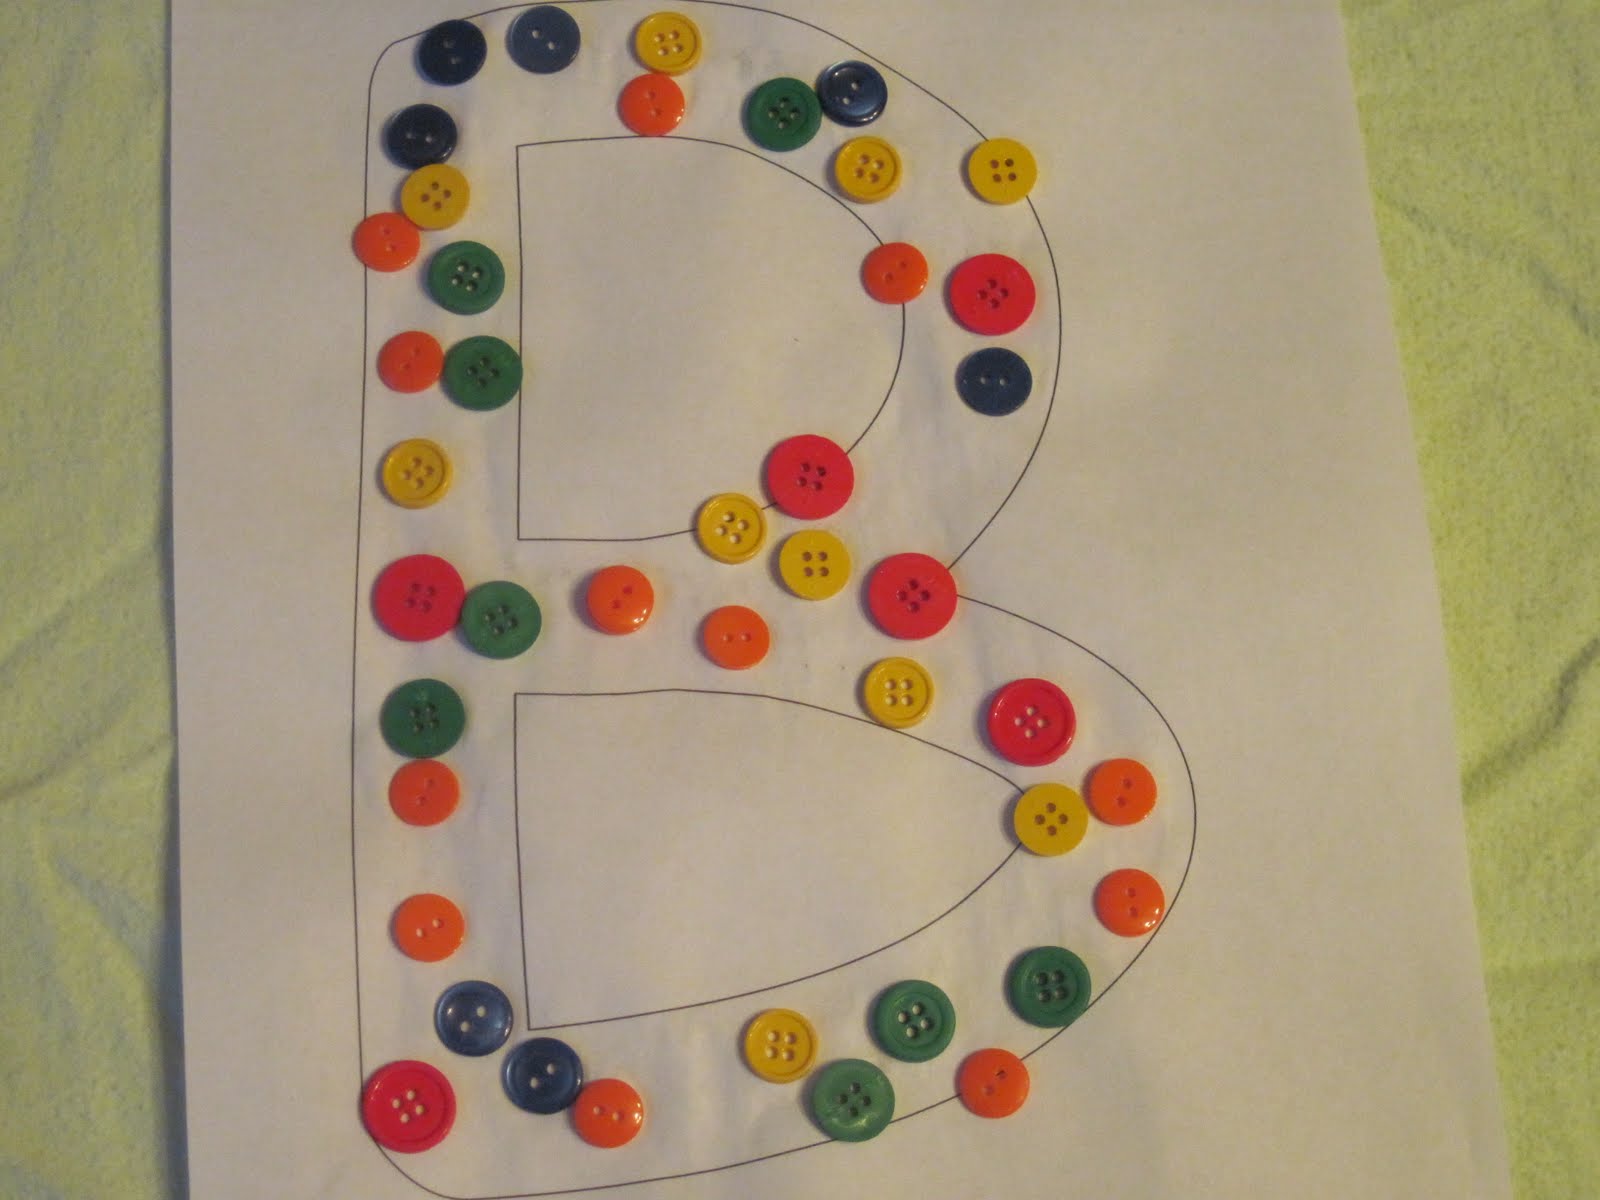
Next we glued Buttons on to the B page. Before we did any actual gluing, we sorted buttons by color and size first. I figured I might as well get some extra lessons in while I had the buttons out.
Next we glued Beans on to the B page. These beans are from our bean activity box. My son loves to scoop and pour out the beans. We also have a bunch of the beans that I wrote out the alphabet and numbers on for us to use in practicing letters and numbers.
This last activity that we did with the B page is my favorite. We made a Bee! I let him paint the B yellow and I cut out some black wings and black antennas. Once the yellow paint was dried, I let him paint on some black stripes and we waited for that to dry. Once the paint was completely dried we glued on the wings and the antennas. I think he turned out really cute.
Some other ideas to reinforce the letter B:
Food suggestions:
Bananas, bagels, bread, beans, broccoli, blueberries, basil, butter, brownies, blackberries, bundt cake and burritos. There are plenty more foods that start with B but I do not want to overload you.
Our food activity included making butter! I was excited to try this experiment to see how long it really took.
To do this you will need the following ingredients:
Glass jar with lid (I used a baby food jar)
Heavy Cream
Pour the heavy cream into the glass jar, no more than 1/2 to 2/3 full. The more cream in the jar the longer you must shake it to make the butter. I shook it for 10 minutes and had quite a bit of butter in the jar. Once you can feel the weight of the jar change and hear the butter you can stop. I poured mine into a strainer to let the buttermilk drain away as I did not actually need it. I then used some paper towels to dry the butter a bit, put it in a container and sprinkled it with a little salt, covered it and put it in the fridge to harden a little bit. The butter is quite soft when you make it. My son is only three so he did not help much with making the butter but he did shake it a little while before he lost interest.
You can print out the letter B and put it in a clear sheet protector/report cover or laminate it and give the child a dry erase marker to practice writing the letter B.
You can write the letter B on a chalkboard and give the kid a small amount of water with a paint brush. They can dip the brush in the water and use it to erase/trace your letter.
Find the letter B. Give a child a marker and an old magazine or newspaper. Ask them to go through a few pages and circle the letter B.
Lacing Cards - Print out the letter B and laminate it. Punch a hole every inch or so and let the child lace yarn or a shoestring.
Paint Bag - Squirt some tempura paint of shaving cream in a zipper style bag. Seal the bag, squeezing out as much air as possible. For safety and cleanliness sake, tape the bag closed also. Now put the bag on the desk and allow the child to trace the B.
All images that are easy to save, please hold onto those and put them all in a Alphabet Binder for the child. To make the binders I will put the pictures in sheet protectors and then put them in a 3 ring binder.
I wanted something new and fresh this week and had a harder time than I imagined trying to find it. Many of the things I had seen were just a revision of older ideas. I have found somethings that I think are original thought.
First up is Food Face Plates.
I found this idea on At Second Street and immediately fell in love with it. It reminds me of the little faces we used to get as kids that were bald and you used the magnetic pen through the plastic cover to move the metal chips around and give the guy hair. Do they even make those anymore?
A Math Game
Next up is a great math game that was put together with some inexpensive materials from the Dollar Store. Not only is it original and educational but it is inexpensive also. You can find this activity at No Tome For Flashcards and I am confident you can put together one easily for your kids.
Soy Crayons
I love this idea, not only are the crayons child safe but these are the perfect shape for the youngest kids. You do not have to make eggs but you could make any shape that your kids desire. This idea comes from Wee Folk Art, which is a great blog with lots of amazing and creative ideas.
I hope you will take some time and check out these links. There are tons of great ideas out there, you just have to take a few minutes to look for them. Make it a great week!
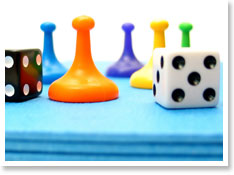
Do you have a family game night at home yet? If not, there is no time like the present to start one. I have a few suggestions below to get you started without resorting to the same old board games that we have all played our entire lives. Don't get me wrong, I love the classic board games like Life, Monopoly, Connect Four and Battleship but they are not always easy to play with the younger set whether it be the rules, the counting or game length. Not to mention, sometimes it is just fun to make up games strictly for your family.
Our first game will be "Family Trivia". Get some index cards and write out some facts/questions about your family. Some of the questions can be easy and some will be a little harder. Some examples could be: Who hit a home run in the family softball game at last year's reunion? (Answer: Uncle John) Who collects My Little Pony? (Answer: Cousin Emily) You can get as detailed as you would like. If the kids are pretty young, you could use photos of family and ask them to tell you one fact about them. For example, you have a picture of Aunt Sheila and the fact about her is that she lives in Kansas. Not only is this a good game for current time but it can help to keep some memories alive for your family. Cousin Emily may not always collect My Little Pony toys but it will be fun to remember when her entire room was covered in them. You could even make up new questions for a yearly version of the game.You can store the cards in an index box or a photo storage box. As you make the cards, be sure to make an answer key to keep with the cards, not to cheat by but to remember the answers years from now when the softball games are long forgotten.
Iron Chef - Home Style
Pick out a food. For example if you pick cupcakes everyone could make cupcakes and decorate them. If the kids are fairly young you could base it entirely on decorating the cupcakes since they may be to young to use the oven. At the end of the challenge then the person with the funniest or the prettiest or the most original cupcake design would be the winner. Maybe a good prize could be their choice for bedtime story or their choice for movie night.
Animal Charades
This is a great game for toddlers and older. You can get pictures of animals that everyone recognizes. Put them all in a bucket and when one is pulled out the other players have to figure out the animal they are strictly based on their actions. They are not allowed to speak. If they are toddlers and they have been acting it out for awhile with no successful guesses you may want to let them make the animal sounds to make some progress in the guessing.
These should be a good start for your Family Game Night. You do not always have to have the newest electronics or the coolest movies and games to have a good time with your family.
On the family calendar for today (get your copy under June on the right side of the screen) it says to help your kids deliver an art/craft to a neighbor today. I have a great craft here for you.
All you will need is a variety of flowers, some blank stationary, a few paper towels, a hammer and just in case, some safety glasses. As you can see above, some flowers make better impressions than others.
I know the hammer sounds a little scary but with supervision a variety of ages should be able to do this craft. Choose your first flower and put it face down on the stationary. Keep in mind that the point of the stationary is to write letters so please keep your flowers to the edges of the paper. Once you have the flower face down, put a paper towel over the flower, put on the safety glasses and pick up the hammer. You are going to hit the back of the flower through the paper towel. This should leave a pretty impression on the stationary creating a one of a kind gift for a friend or neighbor. You can do this with paper and envelopes and then wrap them with some raffia as a beautiful handmade and inexpensive gift. This is one of the items you can give "just because it is Thursday".
Well, I thought we would begin a series with the alphabet. The best way to teach a child is still through repetition so I would not aim to do more than one letter per week. You could start at the beginning of the week by introducing the letter and doing a craft with it and then each day continue to make a focus on that letter.
Many blogs and books are focused on the alphabet and many of the blogs bounce around in the alphabet instead of teaching it in order. If you have several kids, I would go into it in order but if you are just teaching your own child you may want to teach them their name first. If his name is Thomas, start with the T first.
Since I am not focusing solely on one child in this post, I will start with the letter A.
Please print out the page above by right clicking on it and printing or by clicking here.
This page will be a starting point for us to teach the child things that start with the letter A. You will complete a craft with them of the A item you choose. Here are some options:
Thumbprint Ants - Paint your child's thumb with paint and have them make three prints touching side by side. They will continue to make three touching prints all over the letter A. Once the paint is dry you or the child can go back and draw the 6 legs and 2 antennas to make it look like an ant. As we know ants are usually brown or black but do not hesitate to let your child be creative in choosing the ant color for their art.
Almonds - You can glue slivered almonds onto the A. Please verify that there are no nut allergies prior to doing this project!
Apples - If you know someone that has an apple tree in their yard, get a small apple and cut it in half. Let your kids dip the cut side in paint and stamp it on the A. I like this best with the smaller apples but if you do not have access to small apples from a tree just get the smallest one you can from the store.
Alligators - Let the child color or paint the A. Now turn the A on its side to represent an alligator head. Use some foam triangles or some paper triangles as teeth and glue them into the open mouth. Attach two more foam triangles or a piece of paper with eyes drawn on to the top of the A.If you use foam you can attach googly eyes instead of drawing them on.
Some more ideas to reinforce the letter A.
Food choices:
Apples, Avocado, Asparagus, Angel Hair Pasta, Apricots, Alfalfa Sprouts, Artichokes, Albacore Tuna, Animal Crackers and Apple Jacks Cereal
You can make them "Ants on a Log" by taking celery and cutting in about 3" long pieces. Fill it with peanut butter (again check for nut allergies) or cream cheese then put raisins or dried cranberries on it to represent the ants. You could also make "Safari Logs" by replacing the ants with animal crackers.
You can print out the letter A and put it in a clear sheet protector/report cover or laminate it and give the child a dry erase marker to practice writing the letter A.
You can write the letter A on a chalkboard and give the kid a small amount of water with a paint brush. They can dip the brush in the water and use it to erase/trace your letter.
Find the letter A. Give a child a marker and an old magazine or newspaper. Ask them to go through a few pages and circle the letter A.
Lacing Cards - Print out the letter A and laminate it. Punch a hole every inch or so and let the child lace yarn or a shoestring.
Paint Bag - Squirt some tempura paint of shaving cream in a zipper style bag. Seal the bag, squeezing out as much air as possible. For safety and cleanliness sake, tape the bag closed also. Now put the bag on the desk and allow the child to trace the A.
All images that are easy to save, please hold onto those and put them all in a Alphabet Binder for the child. I will be putting the Thumbprint Ants and the Alligator in a binder. The Almonds would probably not last in a binder sleeve. To make the binders I will put the pictures in sheet protectors and then put them in a 3 ring binder.


